This quick start guide describes how you can tag your files using MusicBrainz Picard.
You should note - Picard is not built to be a mass single-track tag fixer. Picard believes in quality over quantity and provides a plethora of customizations to tweak music collections to your needs.
- Add your files using the Add Files or Add Folder toolbar buttons. For ease of use it is recommended to use the File Browser to manage file system interactions. Click on the View menu and then select File Browser
- Drag a folder to the Unmatched Files folder in the right-hand pane.
- Wait for Picard to process the files (the names will turn from grey to black) and then click the Cluster toolbar button to cluster files into album clusters.
- Select a clustered album and click the Lookup toolbar button to look the cluster up. Depending on your previous metadata, album will show up in the right-hand pane. If an album shows up, go to step 8. Since you are a new Picard user, we recommend that you read the steps in between as well.
- Alternatively, you can also try to use the Scan toolbar button to lookup files using their AcoustID, which is a unique finger-print associated with each recording.
- If nothing happened when you clicked the Lookup or Scan toolbar button, click the Lookup in Browser button toolbar button. Your default browser will open and allow you to find the right album manually.
- Pay attention to the amount of tracks in each album, and pick the one you have. Click the green TAGGER button.
- Drag the clustered album onto the album that was just opened, if it didn't happen automatically.
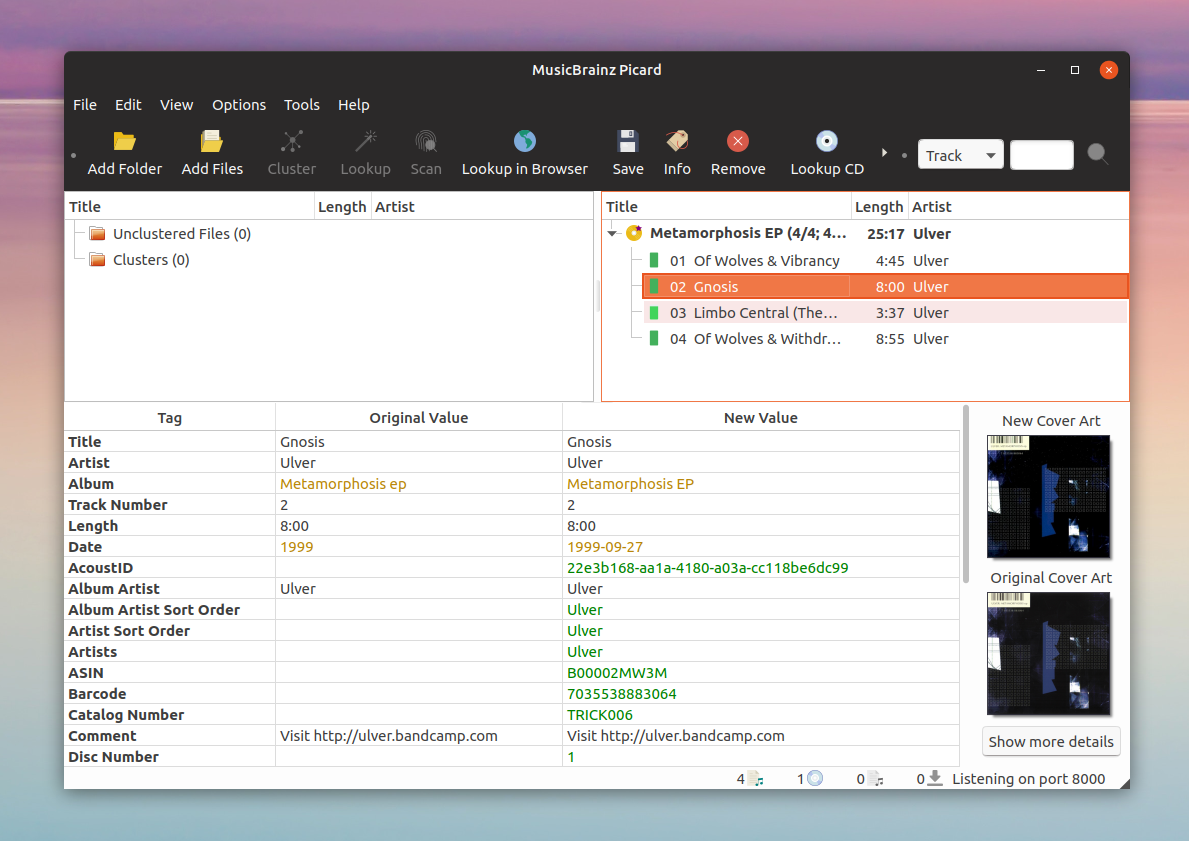
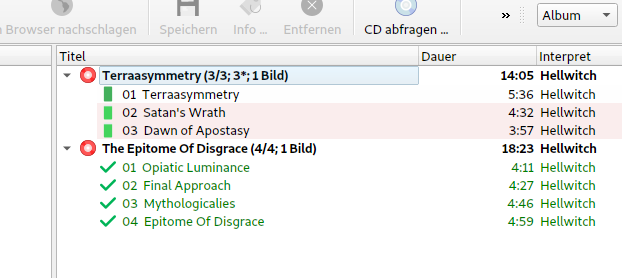
Depending on your previous metadata, Picard will try to guess the matching tracks. The order is green > yellow > orange > red, where green is the best match. If you are seeing a lot of red and orange, it could mean that Picard has guessed wrong, or that your files didn't have a lot previous metadata to work with.
If this is the case, it's recommended to click a track and compare the metadata using the Original Values and New Values at the bottom of picard window. If there is an incorrect match, simply drag & drop the track to its correct spot.
When you are satisfied with the matches, select the album you want to save and click on the Save toolbar button to save files.
- A green check mark means the file is saved in its proper location.
Last Updated on
MusicBrainz Picard is a 3rd-party application that connects the media folders on your computer to the MusicBrainz database. It will scan your MP3 library and attempt to identify the tracks, and then automatically fill in all of the metadata fields. There are 3 primary features of MusicBrainz Picard. Picard is an open-source cross-platform music tagger by MusicBrainz. It has the ability to identify audio files even without any existing metadata. Picard helps you organize your music collection by renaming your music files and sorting them into a folder structure exactly the way you want it. When you use MusicBrainz Picard, you can automatically retrieve the disc ID of your CD to include it in the MusicBrainz database. We have specific documentation on how to add disc IDs. One of the fundamental aims of MusicBrainz is to offer correct and well structured information.


Insight: Install MusicBrainz Picard In Linux, Music Tagger For Linux
Picard is a cross-platform music tagger. It is written in Python. Picard supports all popular music formats like MP3,M4A, FLAC, OGG, WMA, WAV, and many more. Another interesting feature of this is that Picard uses AcoustID audio fingerprints, which allows files to be identified by the actual music, even if they have no metadata.
At the time of this article, MusicBrainz Picard 2.0 stable is the latest version. Some of the new features and improvements in new version are:
- Add DSF file support
- Add keyboard shortcut for deleting scripts from options > scripting page
- Migrate to PyQt5
- Support only 64 bit Picard builds from 2.0
- Make file-specific variables available to tagger script
Install MusicBrainz Picard In Linux

Install using flatpak:
Picard is available on Flathub. Run the following command to enable flatpak repository.

Now install Picard:

Install Picard In Ubuntu
Run the following command to add PPA of Picard:
Now, run the following commands to update and install picard in Ubuntu
To remove MusicBrainz Picard in Ubuntu:
For other Linux based distributions, Please Download the MusicBrainz Picard From The Link Below:
Musicbrainz Picard Free
Related
